samedi 27 novembre 2010

GraniteDS Maven archetypes 1.0 RC1 released

We have noticed from a long time that starting a new project with GraniteDS and the usual Java frameworks is not easy enough. We have tried to simplify the configuration as much as possible by allowing to configure GraniteDS directly in the Spring and Seam configuration files but yet there are many steps and caveeats that can take lots of time when setting up a project. It is even more painful when you add the setup of the build system with Ant or Maven.

Fortunately Maven provides a handy mechanism to bootstrap new projects in the form of archetypes. Along with the release of GraniteDS 2.2, we have also released a set of 4 archetypes for common use cases of GraniteDS :
  • graniteds-spring-jpa-hibernate: Flex 4 + Spring 3 + Hibernate/JPA + GraniteDS with standard RemoteObject API
  • graniteds-tide-spring-jpa-hibernate: Flex 4 + Spring 3 + Hibernate/JPA + GraniteDS with Tide API
  • graniteds-tide-seam-jpa-hibernate: Flex 4 + Seam 2.2 + Hibernate/JPA + GraniteDS with Tide API
  • graniteds-tide-cdi-jpa: Flex 4 + CDI/Weld 1.0 + JPA + GraniteDS with Tide API
It is recommended to use Maven 3 but Maven 2.2 should also work. You can run the archetypes from the command line :
mvn archetype:generate
-DarchetypeGroupId=org.graniteds.archetypes
-DarchetypeArtifactId=graniteds-tide-spring-jpa-hibernate
-DarchetypeVersion=1.0.0.RC1
-DgroupId=com.myapp
-DartifactId=example1 -Dversion=1.0-SNAPSHOT
This will create of project named example1 that you can directly build and run with maven :
cd example1
mvn install
cd webapp
mvn jetty:run-war
Then browse http://localhost:8080/example1/example1.swf. The generated project is a multimodule application skeleton with a Java module, a Flex module and a Web module. It includes basic security, service remoting and data synchronization. The default security configuration includes two hardcoded users: admin/admin and user/user.

It is a good starting point to build your own application, after removing the very few example parts. The most interesting thing in these archetypes is that the build poms are automatically created and that they reference selected versions of each framework (Flex, Spring, Seam, Hibernate...) and of build tools (Flexmojos, Jetty plugin...) that work together correctly.

Spring and Seam archetypes are built to be run inside Jetty (for example with the Maven Jetty plugin as shown before). The CDI/Weld example is built to be run inside GlassFish v3.0.1+ and should also work in JBoss 6 M4 (but not later as next versions include the newer and incompatible Weld 1.1). By default it can be run in embedded GlassFish with :
cd example1
mvn install
cd webapp
mvn embedded-glassfish:run
If you don't want to run inside an embedded container but in Tomcat or another container, and still want to use real-time messaging, you will have to change the Gravity servlet implementation in the web.xml file (implementation class names for Tomcat and JBoss 5+ are in comment in the generated web.xml). Then build a war to be deployed in any application server with :
cd webapp
mvn war:war
This is not a final release of these archetypes but they are already usable. They mostly miss the necessary Maven stuff to run unit tests for Flex and Java projects.

As always don't hesitate to give your feedback.

jeudi 25 novembre 2010

Upgrading from GraniteDS 2.1 to GraniteDS 2.2

GraniteDS 2.2 GA has just been released. There have been a few minor changes in APIs and configurations that require some work when upgrading from GDS 2.1 to GDS 2.2 :

API for PagedQuery

PagedQuery now supports sorting on multiple fields, so the API for server-side components has been changed accordingly and expects arrays for order and desc.
public Map find(Map filter, int first, int max, String[] order, boolean[] desc) {
...
}

Configuration property of server-side validator

The property name in services-config.xml has changed from validator-class-name to validatorClassName for consistency with other properties :
<destination id="seam">
<properties>
<validator-class-name>org.granite.tide.hibernate.HibernateValidator</validator-class-name>
</properties>
</destination>
With Spring, it's also possible to define a validator-name that is the name of a bean that implements org.granite.tide.validators.EntityValidator, the default name expected being "tideValidator".
<bean id="tideValidator" class="com.myapp.MyValidator"/>

mercredi 6 octobre 2010

Presentation of GraniteDS at 360|Flex DC

Franck and I were at the 360|Flex DC conference in September to give a presentation about GraniteDS. It was a very interesting time for us, as it was our first talk in the US and our first talk in a pure Flash/Flex conference. We met nice people there and it was a refreshing change to attend to sessions made by designers about user experience, visual effects and gaming instead of our usual boring enterprise Java stuff. Thanks again to John & Nicole for inviting us.

Our presentation was partly slides and partly demo code and some people asked if we could publish the demo application. After a bit of polishing, it is now available for download. There is an ear that can be deployed in a vanilla JBoss 4.2.3, and the eclipse project with the complete source code and configuration here.

Note that you will need two things in JBoss to run the example :
- Install APR (Apache Portable Runtime): download and install it from here, see install doc here.
- Comment out the "CommonHeadersFilter" section in jboss-4.2.3.GA/server/default/deploy/jboss-web.deployer/conf/web.xml:
<!--
<filter>
<filter-name>CommonHeadersFilter</filter-name>
<filter-class>org.jboss.web.tomcat.filters.ReplyHeaderFilter</filter-class>
<init-param>
<param-name>X-Powered-By</param-name>
<param-value>Servlet 2.4; JBoss-4.2.3.GA [...]</param-value>
</init-param>
</filter>

<filter-mapping>
<filter-name>CommonHeadersFilter</filter-name>
<url-pattern>/*</url-pattern>
</filter-mapping>
-->

Once deployed, it can be accessed from http://localhost:8080/gds-onlinebet/Onlinebet.html.

This demo will probably be included in the distribution examples in the next release of GraniteDS.

Finally if you are interested by the slides, they are available on SlideShare.

As always, don't hesitate to give your feedback.

mercredi 15 septembre 2010

At least you don't need a psychiatrist ;-)

WebORB marketing buzz is somewhere beyond the final frontier: to get to GraniteDS into their decision trees, you first have to go with Java, which doesn't even seem to be the most recommended option according to these guys. Then, you'll have to follow this frustrating path:
Complete messaging? No.
Complete data management? No
Complete code generation? No.
A psychiatrist? No. (if you happen to choose Yes here, you get LCDS ;-)
Scale beyond one server? Yes.
J2EE-centric? Yes.
Here you are: GraniteDS.
So, after refusing all the good things, you, as a GraniteDS user, avoid at least the cost of a therapy!

But the most funny thing is at the end of their post:
We respectfully request that the developers of the other integration servers mentioned herein join us (...)
You may guess that William and I are of course seriously studying this unexpected opportunity.

mardi 10 août 2010

Reflection API, Big Numbers Support and Validation Framework (JSR-303-like)

Starting with GraniteDS 2.2, three ActionScript3 new features are available:
  • A reflection API, that greatly simplifies ActionScript3 class introspection;
  • Long, BigInteger, BigDecimal implementations in ActionScript3, with custom serialization options between Java and Flex;
  • A Flex validation framework, based on the "Bean Validation" specification (JSR-303), with code generation tools support in order to replicate your Java entity beans constraint annotations in your ActionScript3 model.
The documentation for these three new features is available as a preview here, here and here (the links will change to here, here and here later, when the final version will be out).

mercredi 4 août 2010

GraniteDS and GlassFish v3

It has been possible to run GraniteDS on GlassFish v3 since the version 2.0, but the configuration is not very well documented and all the example applications (except for CDI) run by default on JBoss and Tomcat.

It's a bit shameful because GlassFish v3 is currently the only stable JEE6 compliant server and provides many features that are well supported by GraniteDS such as JPA 2 and Bean Validation.

First I'm going to show how to run the examples on GlassFish, then I will give more details on the configuration so you will be able to modify the examples to run on GF.

Running the examples


Once you have unzipped the distribution, you will find an examples folder containing various projects. For now only the graniteds_tide_ejb3, graniteds_tide_cdi, graniteds_tide_spring and graniteds_chat provide out-of-the-box configurations for GlassFish.

First setup your environment (Flex SDK and GlassFish home folders) in examples/env.properties :
FLEX_HOME=E:/Dev/flex_sdk_3_5
FLEX_TASKS_JAR=${FLEX_HOME}/ant/lib/flexTasks.jar

SERVER_HOME=E:/Dev/glassfishv301/glassfish
SERVER_HOME_DEPLOY=${SERVER_HOME}/domains/domain1/autodeploy

Then modify the build.xml file in the example project, by commenting the default JBoss section and uncommenting the GlassFish v3 section :
<!-- Default configuration: exploded EAR for JBoss
<property name="exploded.ear.packaging" value="yes"/>
<property name="gds-hibernate.lib" value="yes"/>
-->

<!-- Alternative configuration for GlassFish V3 with EclipseLink using JPA API
-->
<property name="war.packaging" value="yes"/>
<property name="resources.dir" value="resources_glassfishv3"/>
<property name="gds-eclipselink.lib" value="yes"/>

After that, just run "ant deploy" from the command line in the project folder and the example will be built and deployed to the GlassFish server.
Then start the GF default database with "asadmin start-database" and the server with "asadmin start-domain domain1", and browse http://localhost:8080/graniteds_tide_ejb3.

The other Tide examples are similar, the necessary configuration files are in the resources_glassfishv3 folder of the examples projects. The chat example is a bit different, you just have to replace the web.xml by the provided servlet3-web.xml and deploy the example with "ant deploy".

The non-Tide examples should be relatively easy to modify as they don't provide as many features. Probably the only things to change will be :
  • Adapt the JPA persistence.xml for EclipseLink

  • Change the security service in granite-config.xml to GlassFishV3SecurityService

  • Change the EJB3 lookup String to java:global/graniteds_ejb3/{capitalized.destination.id}ServiceBean
.
Now let's see the necessary configuration in details.

Full setup with Tide, simplified configuration


Before configuring anything, we first have to add the necessary GraniteDS libraries in WEB-INF/lib :
granite.jar : core library
granite-eclipselink.jar : integration with EclipseLink JPA provider
granite-cdi.jar or granite-spring.jar or granite-seam.jar : integration with various frameworks. This is not needed for EJB3 support, it's already built in the core library.

Now let's have a look at what's in the configuration files, for example in the EJB example (note that contrary to JBoss which is not JEE6 compliant, the examples are deployed as war packages and not ear packages) :

WEB-INF/web.xml : It's the standard configuration for JEE6 web archives, notice that it only contains the definition of the security roles, and the persistence unit reference. Thanks to the new web.xml modularization capabilities and new APIs in Servlet 3, GraniteDS can register automatically its servlets and filters.
<web-app version="3.0" xmlns="http://java.sun.com/xml/ns/javaee"
xmlns:xsi="http://www.w3.org/2001/XMLSchema-instance"
xsi:schemaLocation="http://java.sun.com/xml/ns/javaee http://java.sun.com/xml/ns/javaee/web-app_3_0.xsd">

<welcome-file-list>
<welcome-file>index.html</welcome-file>
</welcome-file-list>

<login-config>
<auth-method>BASIC</auth-method>
</login-config>

<security-role>
<role-name>user</role-name>
</security-role>
<security-role>
<role-name>admin</role-name>
</security-role>

</web-app>

GlassFish requires an additional sun-web.xml to define the security roles mapping. Don't forget to create users with roles user or admin in the administration console, otherwise you won't be able to log in the example application.

WEB-INF/classes/META-INF/persistence.xml : Nothing special here, it's a basic JPA persistence unit using the default database and the built-in EclipseLink provider.
<persistence
xmlns="http://java.sun.com/xml/ns/persistence"
xmlns:xsi="http://www.w3.org/2001/XMLSchema-instance"
xsi:schemaLocation="http://java.sun.com/xml/ns/persistence http://java.sun.com/xml/ns/persistence/persistence_2_0.xsd"
version="2.0">

<persistence-unit name="ejb-pu">
<jta-data-source>jdbc/__default</jta-data-source>
<properties>
</properties>
</persistence-unit>
</persistence>

Note that for now there is absolutely nothing concerning GraniteDS, we have just setup a basic JEE6 application. The configuration for GraniteDS consists in two files. First an empty WEB-INF/classes/META-INF/services-config.properties to indicate to the GDS scanner that it should scan for annotated EJB3 in WEB-INF/classes (note this file is only necessary when using EJB3). Then a configuration class annotated with @FlexFilter that will tell GraniteDS to use automatic configuration.
@FlexFilter(
tide=true,
type="ejb",
factoryClass=EjbServiceFactory.class,
ejbLookup="java:global/graniteds_tide_ejb3/{capitalized.component.name}Bean"
entityManagerFactoryJndiName="java:comp/env/ejb-pu",
tideInterfaces={ EjbIdentity.class }
)
public class GraniteConfig {

@MessagingDestination(noLocal=true, sessionSelector=true)
AbstractMessagingDestination addressBookTopic;

}

GraniteDS is registered as a Servlet 3 initializer class that is triggered by the @FlexFilter annotation. The configuration itself is defined by the annotation parameters. The fields annotated with @MessagingDestination define messaging destinations with the same name than the field name.

This defines the simplified configuration for the application. It is however possible to override all this with the 'standard' GraniteDS configuration files.

Full setup with Tide, detailed configuration


Basically there are 3 configuration files :

WEB-INF/web.xml : defines the GDS listeners and servlets
<!-- Granite config context listener -->
<listener>
<listener-class>org.granite.config.GraniteConfigListener</listener-class>
</listener>

<filter>
<filter-name>AMFMessageFilter</filter-name>
<filter-class>org.granite.messaging.webapp.AMFMessageFilter</filter-class>
</filter>
<filter-mapping>
<filter-name>AMFMessageFilter</filter-name>
<url-pattern>/graniteamf/*</url-pattern>
</filter-mapping>

<servlet>
<servlet-name>AMFMessageServlet</servlet-name>
<servlet-class>org.granite.messaging.webapp.AMFMessageServlet</servlet-class>
<load-on-startup>1</load-on-startup>
</servlet>
<servlet-mapping>
<servlet-name>AMFMessageServlet</servlet-name>
<url-pattern>/graniteamf/*</url-pattern>
</servlet-mapping>
<servlet>
<servlet-name>GravityServlet</servlet-name>
<servlet-class>org.granite.gravity.servlet3.GravityAsyncServlet</servlet-class>
<load-on-startup>1</load-on-startup>
</servlet>
<servlet-mapping>
<servlet-name>GravityServlet</servlet-name>
<url-pattern>/gravityamf/*</url-pattern>
</servlet-mapping

This defines exactly the same thing as the simplified configuration, and there is rarely any good reason to use a different url mapping.

Next is the more interesting WEB-INF/flex/services-config.xml. It is similar to the equivalent Flex Remoting / BlazeDS / LCDS configuration.
<services-config>

<!--
! Declares channels.
!-->
<channels>
<channel-definition id="graniteamf" class="mx.messaging.channels.AMFChannel">
<endpoint
uri="http://{server.name}:{server.port}/{context.root}/graniteamf/amf"
class="flex.messaging.endpoints.AMFEndpoint"/>
</channel-definition>

<channel-definition id="gravityamf" class="org.granite.gravity.channels.GravityChannel">
<endpoint
uri="http://{server.name}:{server.port}/{context.root}/gravityamf/amf"
class="flex.messaging.endpoints.AMFEndpoint"/>
</channel-definition>
</channels>

<!--
! Declares ejbFactory service factory.
!-->
<factories>
<factory id="tideEjbFactory" class="org.granite.tide.ejb.EjbServiceFactory">
<properties>
<lookup>java:global/graniteds_tide_ejb3/{capitalized.component.name}Bean</lookup>
</properties>
</factory>
</factories>

<!--
! Declares Flex services. This configuration uses automated destinations
! discovery: see test.granite.ejb3.service.PersonServiceBean.java (the
! @RemoteDestination(id="person", securityRoles={"user","admin"}) annotation)
! and granite-config.xml (the scan="true" attribute). There is no need to
! set the factory: since only one factory is configured, it will be used by
! default.
!
! See also Persons.mxml for the RemoteObject configuration.
!-->
<services>
<service id="granite-service"
class="flex.messaging.services.RemotingService"
messageTypes="flex.messaging.messages.RemotingMessage">
<!--
! Use "tideEjbFactory" and "graniteamf" for "ejb" destination (see below).
!-->
<destination id="ejb">
<channels>
<channel ref="graniteamf"/>
</channels>
<properties>
<factory>tideEjbFactory</factory>
<entity-manager-factory-jndi-name>java:/DefaultEMF</entity-manager-factory-jndi-name>
</properties>
</destination>
</service>

<service id="gravity-service"
class="flex.messaging.services.MessagingService"
messageTypes="flex.messaging.messages.AsyncMessage">
<adapters>
<adapter-definition id="simple" class="org.granite.gravity.adapters.SimpleServiceAdapter"/>
</adapters>

<destination id="addressBookTopic">
<properties>
<no-local>true</no-local>
<session-selector>true</session-selector>
</properties>
<channels>
<channel ref="gravityamf"/>
</channels>
<adapter ref="simple"/>
</destination>
</service>
</services>

</services-config>

First are the channel definitions. Here we have one AMF remoting channel and one Gravity (comet-style messaging) channel. Of course the endpoint URIs should match the servlet mappings what we specified in web.xml.

Then we find the factory definitions. In this example we define an EJB3 service factory that will route AMF remoting request to the corresponding beans. This factory requires one specific property, the JNDI lookup string. Other factories could require different properties.

Lastly we have the more interesting service definitions. Here we define one remoting service with the Tide EJB destination mapped to the AMF channel and the EJB service factory. Then we define a messaging service with a simple messaging destination. As before this is exactly the same configuration than was defined with the simplified configuration. These defaults are suitable for most usages, you will very rarely need to change something here. The only things that you will eventually have to define here are messaging destinations (but you can also define them with the simplified configuration). Remoting destinations are automatically discovered by the GraniteDS class scanner.

The last configuration file is WEB-INF/granite/granite-config.xml. It contains all the GraniteDS specific internal configuration parameters (thread pool parameters, externalizers, converters...). You can refer to the documentation to get details on these parameters.

That's all for the basic stuff. As you have noticed, there are not many specific parameters for GlassFish, except maybe the EJB lookup string, and the Gravity Servlet 3 servlet. Let's see now how to integrate GraniteDS with the various pieces of JEE6 features :

Integration with container security


The simplified configuration auto-detects the container and registers the correct security integration service. You can also define it manually in granite-config.xml :
<granite-config scan="true">
<security type="org.granite.messaging.service.security.GlassFishV3SecurityService"/>
</granite-config>

This integration service allows to use container security to authenticate and authorize Flex clients. It also allows to propagate the security context to other server components.

Integration with EclipseLink JPA provider


GraniteDS is able to serialize correctly EclipseLink detached entities. When using the default configuration with scanning enabled, adding the granite-eclipselink.jar is enough to provide this support, otherwise you can manually add the externalizer and class getter configuration in granite-config.xml :
<class-getter type="org.granite.eclipselink.EclipseLinkClassGetter"/>

<externalizers>
<externalizer type="org.granite.eclipselink.EclipseLinkExternalizer">
<include annotated-with="javax.persistence.Entity"/>
</externalizer>
</externalizers>

When using the Tide framework, Tide needs to have access to an EntityManager to support transparent lazy loading. You can define it in services-config.xml in the property entity-manager-factory-jndi-name of the Tide destination :
<destination id="ejb">
<channels>
<channel ref="graniteamf"/>
</channels>
<properties>
<factory>tideEjbFactory</factory>
<entity-manager-factory-jndi-name>java:comp/env/ejb-pu</entity-manager-factory-jndi-name>
</properties>
</destination>

You can also define this in the simplified configuration :
@FlexFilter(
tide=true,
type="ejb",
factoryClass=EjbServiceFactory.class,
entityManagerFactoryJndiName="java:comp/env/ejb-pu",
tideInterfaces={EjbIdentity.class}
)
public class GraniteConfig {
}

As this is a relative JNDI name, you also have to define the persistence-unit-ref in web.xml :
<persistence-unit-ref>
<persistence-unit-ref-name>ejb-pu</persistence-unit-ref-name>
</persistence-unit-ref>

Alternatively you can use the entity manager JNDI name. It's maybe better because it lets the container manage the persistence context.
<destination id="ejb">
<channels>
<channel ref="graniteamf"/>
</channels>
<properties>
<factory>tideEjbFactory</factory>
<entity-manager-jndi-name>java:comp/env/ejb-pc</entity-manager-jndi-name>
</properties>
</destination>

Or
@FlexFilter(
tide=true,
type="ejb",
factoryClass=EjbServiceFactory.class,
entityManagerJndiName="java:comp/env/ejb-pc",
tideInterfaces={EjbIdentity.class}
)
public class GraniteConfig {
}

And
<persistence-context-ref>
<persistence-context-ref-name>ejb-pc</persistence-context-ref-name>
<persistence-unit-name>ejb-pu</persistence-unit-name>
</persistence-context-ref>

Integration with Bean Validation


The integration mostly consists in correct exception translation of validation errors to standardized client-side errors, and of support of remote validation of input fields with the TideInputValidator Flex component. Note that it is supported only when using the Tide service factory.
First you need to add the granite-beanvalidation.jar library in WEB-INF/lib.
If you disable the automatic scanning, you have to register the exception converter manually in granite-config.xml :
<exception-converters>
<exception-converter>org.granite.tide.validation.BeanValidationExceptionConverter</exception-converter>
<exception-converters>

For remote validation, you have to define the validator class name in the destination properties :
<destination id="ejb">
<channels>
<channel ref="graniteamf"/>
</channels>
<properties>
<factory>tideEjbFactory</factory>
<entity-manager-jndi-name>java:comp/env/ejb-pc</entity-manager-jndi-name>
<validatorClassName>org.granite.tide.validation.BeanValidation</validatorClassName>
</properties>
</destination>

Note that this will not be necessary from GraniteDS 2.2.0.RC1 as this will be the default when bean validation libraries are available. Also the property name will be changed to validator-class-name for consistency with other property names.

I've probably not covered all questions about GlassFish v3 support in GraniteDS, so don't hesitate to post comments if some things are still unclear.

mardi 3 août 2010

GraniteDS and the current state of Servlet 3

GraniteDS, and in particular the Gravity comet-like push greatly benefit from the asynchronous capabilities of the servlet containers to get a much better scalability than traditional synchronous servlets. It allows the server to handle long-polling http requests without blocking threads unnecessarily: basically long-polling http requests do nothing most of the time and wait for the server to have something to send.

Asynchronous processing has been supported for a long time on the most popular containers (Tomcat, Jetty, JBossWeb) but the implementations depend on the container-specific APIs (CometProcessor for Tomcat, Continuations for Jetty, HttpEvent for JBossWeb). The Servlet 3 API, approved almost a year ago as part of JEE6, is supposed to bring standardisation to this domain. It's very interesting for Gravity because it means that we could have only one implementation for all containers. Unfortunately the only stable container currently supporting Servlet 3 is GlassFish v3 which is the reference implementation, thus we built our experimental support for Servlet 3 in GraniteDS 2.0 on this server.

There are now a few near-stable containers supporting Servlet 3 and we have made some improvements to our servlet 3 support, so it's interesting to have a look now at how GraniteDS behaves on the following containers :
  • GlassFish v3.0.1 (download here)

  • Tomcat 7 beta (download here)

  • Jetty 8 M1 (download here)

  • JBoss 6 M4 (download here)


Gravity can be configured for Servlet 3 with the following snippet in web.xml :
<servlet>
<servlet-name>GravityServlet</servlet-name>
<servlet-class>org.granite.gravity.servlet3.GravityAsyncServlet</servlet-class>
</servlet>
<servlet-mapping>
<servlet-name>GravityServlet</servlet-name>
<url-mapping>/gravityamf/*</url-mapping>
</servlet-mapping>


Thanks to the new servlet 3 APIs, it's also possible to simply add a marker class to configure GraniteDS :
@FlexFilter
public class GraniteConfig {
}

In this case, there is nothing to configure in web.xml, and the Gravity servlet will be mapped on /gravityamf/* by default.

The good news is that the GraniteDS examples (in particular the chat) all work correctly on these containers with this Servlet 3 support. But of course there are a few issues that I'm going to detail.

Tomcat 7 beta

Even if it was functioning relatively correctly, the CometProcessor API in Tomcat 6 was sort of a hack and had lots of issues. It seems to be better with Servlet 3 on Tomcat 7 but there are still problems.
Tomcat requires either a NIO connector or the APR native library to handle asynchronous servlets, and these connectors have quite different behaviours with GDS 2.1.0.GA. None seems to lose messages or drop requests though, but APR triggers lots of strange NullPointerExceptions. We do not know yet if the problem comes from Tomcat or from Gravity (GDS-703).

JBoss 6 M4

Support of Servlet 3 in JBossWeb has been added since JBoss 6 M2. It works much better that Tomcat 7, but there are occasional IllegalStateExceptions that maybe come from Gravity. Notice that you will also need a NIO connector or the APR native library (JBossWeb is more or less a modified Tomcat).
Also note that due to this bug, support for asynchronous servlets will not work with CDI.

Jetty 8 M1

As always with Jetty, everything seems to work just fine without too much hassle. Just download, install and start. We have not found any particular issue yet with GDS 2.1.0.GA.

GlassFish v3.0.1

No big issue detected until now. We have not conducted extensive testing, but Servlet 3 support can be considered stable. Of course for production use, you should run your own stress tests depending on your application.

It's nice to see JEE6 taking shape in the open source space and hopefully all these containers will be released before the end of the year. Support in WebLogic or WebSphere seems a lot more distant, but who knows.

mardi 6 juillet 2010

Flex / Grails CRUD application with GraniteDS, reloaded

Now with Flex 4, Spring Security 3, data push...


It's been almost one year since the last blog entry about the gdsflex plugin. We have just released the version 0.8 of the plugin that brings compatibility with all new releases of the various technologies involved: Grails 1.2/1.3, Flex 4, Spring Security 3... It's time to update the tutorial for this whole new stack.

For the purpose of this article, I'll just write the same boring book application that I've demonstrated before, and simply add additional capabilities: security and data push.

The first important thing before starting is that you now need to install a Flex SDK somewhere and set the FLEX_HOME environment variable to point to its path. It you want to use a Flex 4, that will look like FLEX_HOME = /home/will/flex_sdk_4.
Older versions of the plugin used to embark a full Flex SDK for ease of use, but using FLEX_HOME allows for easier upgrades of the Flex SDK and is more in line with the behaviour of other Grails plugins.

You will also need Grails 1.3.1+ installed and set up (the plugin also works with Grails 1.2.2+ but that could need some minor adjustments in the following steps). Now type from the command line :

grails create-app bookmanager

cd bookmanager

grails install-plugin gdsflex

Part 1 : Define the domain classes and generate a scaffolded Flex application


Just as before, the core of the application is centered on Grails, and more precisely on the domain classes, following usual Grails domain-driven style. Once again we'll start by an Author class.

grails create-domain-class Author

grails-app/domain/bookmanager/Author.groovy
package bookmanager

class Author {

static constraints = {
name(size:0..50, blank:false)
birthDate(format:'DD/MM/YYYY')
picture(nullable:true, widget:'image')
}

String uid

String name

Date birthDate

java.sql.Blob picture
}


And the corresponding controller, here using scaffolding for simplicity :
grails create-controller Author

grails-app/controllers/bookmanager/AuthorController.groovy
package bookmanager

@org.granite.tide.annotations.TideEnabled
class AuthorController {

def index = { redirect(action:list, params:params) }

def scaffold = Author
}


This is not much different from the previous blog examples. Just notice how Grails 1.3 automatically puts domain classes and controllers in a package with the same name than the application.
As always the TideEnabled annotation exposes the controller to the Flex client.

Now we can generate and compile the Flex application :
grails generate-flex-app

grails mxmlc

grails run-app

And go to http://localhost:8080/bookmanager/bookmanager.swf.

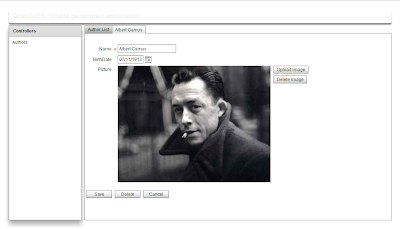
You can see a basic working Flex application that allows to create and edit authors. For now the generated app still uses Flex 3 Halo components and not Flex 4 Spark components, but it can perfectly be compiled and run with the Flex 4 SDK.
Future releases of the plugin will generate a Flex 4 Spark application.


What has happened ?
The generate-flex-app script has generated a basic mxml that handles CRUD operations using the Tide UI builder library in grails-app/view/flex/bookmanager.mxml.
The mxmlc script triggers the Flex compiler to build the application swf in grails-app/views/swf.

The Grails server is now started from this terminal, open a new terminal/command line editor to type the next commands.

Now let's add a couple of other classes with associations.
grails create-domain-class Book

grails create-domain-class Chapter

grails create-controller Book

grails-app/domain/bookmanager/Book.groovy
package bookmanager

class Book {

static constraints = {
title(size:0..100, blank:false)
category(inList:["Fiction", "Non-fiction", "Biography"])
author()
description(size:0..2000, widget:"textArea")
chapters(editable:true)
}

String uid

String title

String category

Author author

Set chapters

String description

static hasMany = [ chapters:Chapter ]
static mapping = {
author fetch:"join"
chapters cascade:"all-delete-orphan"
}
}

grails-app/domain/bookmanager/Chapter.groovy
package bookmanager

class Chapter {

static constraints = {
title(size:0..50, blank:false)
}

String uid

Book book

String title

String summary

static mapping = {
book fetch:"join"
}
}

grails-app/controllers/bookmanager/BookController.groovy
package bookmanager

@org.granite.tide.annotations.TideEnabled
class BookController {

def index = { redirect(action:list, params:params) }

def scaffold = Book
}

An important thing is that ManyToOne associations must be marked fetch:"join" or lazy:false. GraniteDS does not support transparent lazy loading for single ended associations, and most likely never will (it would generate unacceptable network and database traffic, one http request and one SQL query for each uninitialized entity). Lazy collections are supported, so OneToMany and ManyToMany associations do not have to be marked lazy:false.

Once the domain classes written, we can generate their Flex ActionScript 3 equivalents with :
grails gas3


An add a Book entry to the main menu in grails-app/view/flex/bookmanager.mxml.
...
<mx:LinkButton label="Books" width="100%" textAlign="left"
click="mainStack.selectedChild = bookUI" />
...
<ui:EntityUI id="bookUI"
entityClass="{Book}"
width="100%" height="100%"/>
...


I won't get into much details about the EntityUI stuff. It comes from the built-in Tide UI builder library that enables the dynamic client-side scaffolding.
For real applications, you should write your own Flex UI to obtain a really rich and usable interface. The auto generated application can be mostly seen as a quick and dirty prototype.

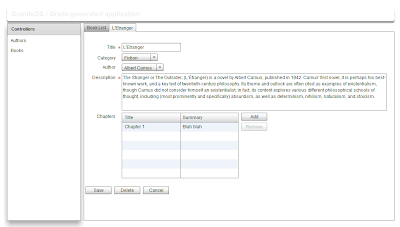
We can now create and edit books, and see how many-to-one and one-to-many associations are displayed in the generated application.

If you eventually tried to add chapters, you will see that it does not work. There are indeed two minor changes to do manually in the AS3 classes to help the UI builder make the link between the associated oneToMany entities: initialize the Chapters collection in the Book.as class, and add a constructor in Chapter.as :

grails-app/views/flex/bookmanager/Book.as
public function Book():void {
chapters = new ArrayCollection();
}

grails-app/views/flex/bookmanager/Chapter.as
public function Chapter(book:Book = null):void {
this.book = book;
}


Once these changes are made, just refresh the browser and check that you can add chapters to your books. Notice how the Gas3 generator and the Flex compiler have been triggered automatically in the background in the running Grails window.


Part 2 : Securing the application


In a real application, it would required that only authenticated users can access enterprise data. Since 0.8, the gdsflex plugin supports the spring-security-core plugin that integrates with Spring Security 3.

Stop the Grails server, and install the plugin with :
grails install-plugin spring-security-core


Then generate the security domain classes Person and Authority (I don't know why, other class names have not worked with the spring-security-core 0.4.1) :
grails s2-quickstart bookmanager Person Authority


The security plugin has generated 3 domain classes : Person, Authority and PersonAuthority. As we have not configured a real database, we are simply going to add a bootstrap script to create default users and roles for our application.

grails-app/conf/Bootstrap.groovy
import bookmanager.Person
import bookmanager.Authority
import bookmanager.PersonAuthority

class BootStrap {

def springSecurityService

def init = { servletContext ->

def user_admin = new Person(username:"admin",
password: springSecurityService.encodePassword("admin"),
enabled:true).save()

def user_user = new Person(username:"user",
password: springSecurityService.encodePassword("user"),
enabled:true).save()

def role_admin = new Authority(description:"Admin",
authority:"ROLE_ADMIN").save()
def role_user = new Authority(description:"User",
authority:"ROLE_USER").save()

new PersonAuthority(person:user_admin, authority:role_admin).save()
new PersonAuthority(person:user_user, authority:role_user).save()
}

def destroy = {
}
}

Now we need to secure access to the application and add a login page. We will make use of the built-in Tide identity component and define a ViewStack to display/hide the login page depending on the current authentication state.

Here's the relevant code to add to grails-app/views/flex/bookmanager.mxml :
<mx:Application
...

import org.granite.tide.spring.Identity;
import org.granite.tide.events.TideResultEvent;
import org.granite.tide.events.TideFaultEvent;

...

[Bindable] [Inject]
public var identity:Identity;

[Bindable]
private var message:String;

private function loginResult(event:TideResultEvent):void {
message = "";
}

private function loginFault(event:TideFaultEvent):void {
message = event.fault.faultString;
}

...

<mx:ViewStack id="appView" selectedIndex="{identity.loggedIn ? 1 : 0}" width="100%" height="100%">
<mx:VBox width="100%" height="100%" verticalAlign="middle" horizontalAlign="center">
<mx:Panel title="Login"
horizontalAlign="center"
verticalGap="0" paddingTop="8" paddingBottom="8"
xmlns:mx="http://www.adobe.com/2006/mxml">

<mx:Form>
<mx:FormItem label="Username">
<mx:TextInput id="username"/>
</mx:FormItem>
<mx:FormItem label="Password">
<mx:TextInput id="password" displayAsPassword="true"
enter="identity.login(username.text, password.text, loginResult, loginFault);"/>
</mx:FormItem>
</mx:Form>

<mx:Label text="{message}"/>

<mx:Button label="Login"
click="identity.login(username.text, password.text, loginResult, loginFault);"/>
</mx:Panel>
</mx:VBox>

<mx:VBox id="mainUI" width="100%" height="100%">
<mx:ApplicationControlBar id="acb" width="100%">
<mx:Label text="GraniteDS / Grails generated application" fontSize="18" fontWeight="bold" color="#f0f0f0"/>
<mx:Spacer width="100%"/>
<mx:Label text="Logged in as {identity.username}"/>
<mx:Button label="Logout" click="identity.logout()"/>
</mx:ApplicationControlBar>

...
</mx:VBox>

</mx:ViewStack>
</mx:Application>


There is nothing very sophisticated here, just notice how we make use of the identity.loggedIn property to display the correct UI and identity.login/identity.logout to trigger user login/logout.

You can restart the application, and check that you can log in with the admin/admin and user/user usernames and passwords combinations (and obviously not with others).

Note that we could also have relied on the default html login page of the spring-security-core plugin to secure the application and protect access to the swf itself. That would be the way to go to enable OpenID authentication or any other Web-based authentication model. In this case, you don't necessarily have to add a Flex login page, but you have to indicate to Flex that it has to retrieve the authentication state at startup with something like :
<mx:Application creationComplete="identity.isLoggedIn()" ... />


This can also be used to allow the authentication state to be restored after a browser page refresh.

We can now try to add more advanced authorization filtering. Let's say that we want to forbid deletion of authors by non-administrator users. This requires a few steps :

1. Enable authorization support in grails-app/conf/GraniteDSConfig.groovy


graniteConfig {
springSecurityAuthorizationEnabled = true
springSecurityIdentityClass = org.granite.tide.spring.security.Identity3
}


This tells GraniteDS to enable integration with Spring Security authorizations and defines the Identity3 integration class for Spring Security 3 (the one used in the spring-security-core plugin).

2. Use the Identity component


Usually you will use the Identity component with Flex data binding on component properties such as visible or enabled to hide/disable parts of the UI depending on the user access rights.
For example this will define a button that is displayed only to administrator users :
<mx:Button label="Delete" visible="{identity.ifAllGranted('ROLE_ADMIN')}" includeInLayout="{identity.ifAllGranted('ROLE_ADMIN')}"/>


In our example, it will be a bit more tricky because we use the automatic Tide UI builder. We have to override the default mxml for authors and manually set the data binding for the visible and includeInLayout properties.

grails-app/views/flex/AuthorEdit.mxml
<ui:EntityEdit 
xmlns:mx="http://www.adobe.com/2006/mxml"
xmlns:ui="org.granite.tide.uibuilder.*"
xmlns="*">
<mx:Script>
import mx.binding.utils.BindingUtils;
import org.granite.tide.spring.Identity;

[Inject]
public var identity:Identity;

protected override function layoutForm():void {
super.layoutForm();

BindingUtils.bindProperty(this.buttonBar.getChildAt(1), "includeInLayout", identity,
{ name: 'ifAllGranted', getter: function(identity:Identity):Boolean { return identity.ifAllGranted('ROLE_ADMIN'); } }
);
BindingUtils.bindProperty(this.buttonBar.getChildAt(1), "visible", identity,
{ name: 'ifAllGranted', getter: function(identity:Identity):Boolean { return identity.ifAllGranted('ROLE_ADMIN'); } }
);
}
</mx:Script>
</ui:EntityEdit>


And the override in the main mxml :

grails-app/views/flex/bookmanager.mxml
...            
Spring.getInstance().addComponentWithFactory("bookmanager.author.entityEdit", AuthorEdit,
{ entityClass: Author }, true, true, Tide.RESTRICT_UNKNOWN, null, false);
...


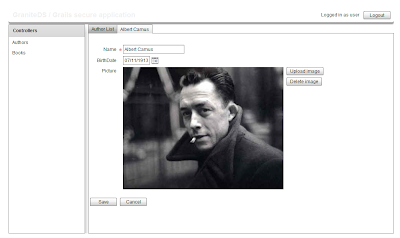
Now if you restart the application, you can check that the Delete button is displayed only when you are logged in as administrator.
Note that user authorizations are retrieved from the server the first time, but are then cached locally, so it's not expensive to add as many ifAllGranted as you wish in the application.


Part 3 : Enabling data push for the application


We can now securely display, create, edit and delete our data. The last advanced feature of GraniteDS that I will show in this post is the data push that allows data updates to be propagated in near real-time to other users.
Once again it involves a few steps :

1. Configure a Tomcat NIO connector


The default Tomcat configuration included in Grails 1.2+ does not use a NIO connector. Using the NIO connector is recommended for GraniteDS data push to provide the better scalability.
It is possible to use the default connector during development but the NIO configuration is interesting (as an aside, thanks to John Fletcher for having taken the time to dig this from the deep of the Grails mailing list, see here: http://www.saltwebsites.com/blog/grails-gds-gravity-guide).
In scripts/_Events.groovy, add this :
import org.apache.catalina.connector.Connector;

eventConfigureTomcat = { tomcat ->

def nioConnector = new Connector("org.apache.coyote.http11.Http11NioProtocol")
nioConnector.port = 8081
nioConnector.setProperty("redirectPort", "8443")
nioConnector.setProperty("protocol", "HTTP/1.1")
nioConnector.setProperty("enableLookups", "false")

tomcat.service.addConnector nioConnector
}


Then you will have to access the application with http://localhost:8081 instead of the standard port 8080.

Note that for production use, it is highly recommended to use the native APR connector, see in the Tomcat documentation here for more information.

2. Enable Gravity/push support in grails-app/conf/GraniteDSConfig.groovy


graniteConfig {
springSecurityAuthorizationEnabled = true
springSecurityIdentityClass = org.granite.tide.spring.security.Identity3

gravityEnabled = true
dataDispatchEnabled = true
}

3. Define a Gravity channel and destination


Then we have to define a Gravity channel and topic in the services-config.xml Flex configuration:

web-app/WEB-INF/flex/services-config.xml:
<services-config>
<services>
<service id="granite-service"
class="flex.messaging.services.RemotingService"
messageTypes="flex.messaging.messages.RemotingMessage">

<destination id="spring">
<channels>
<channel ref="my-graniteamf"/>
</channels>
<properties>
<factory>tideSpringFactory</factory>
<persistenceManagerBeanName>tidePersistenceManager</persistenceManagerBeanName>
</properties>
</destination>
</service>

<service id="gravity-service"
class="flex.messaging.services.MessagingService"
messageTypes="flex.messaging.messages.AsyncMessage">
<adapters>
<adapter-definition id="simple" class="org.granite.gravity.adapters.SimpleServiceAdapter"/>
</adapters>

<destination id="bookManagerTopic">
<properties>
<session-selector>true</session-selector>
</properties>
<channels>
<channel ref="my-gravityamf"/>
</channels>
<adapter ref="simple"/>
</destination>
</service>
</services>

<factories>
<factory id="tideSpringFactory" class="org.granite.tide.spring.SpringServiceFactory">
</factory>
</factories>

<!--
! Declares my-graniteamf channel.
!-->
<channels>
<channel-definition id="my-graniteamf" class="mx.messaging.channels.AMFChannel">
<endpoint
uri="http://{server.name}:{server.port}/{context.root}/graniteamf/amf"
class="flex.messaging.endpoints.AMFEndpoint"/>
</channel-definition>

<channel-definition id="my-gravityamf" class="org.granite.gravity.channels.GravityChannel">
<endpoint
uri="http://{server.name}:{server.port}/{context.root}/gravityamf/amf"
class="flex.messaging.endpoints.AMFEndpoint"/>
</channel-definition>
</channels>
</services-config>

4. Configure the Flex client application to use the topic


grails-app/view/flex/bookmanager.mxml
import org.granite.tide.data.DataObserver;

// Register a data observer component with the name of the topic
Spring.getInstance().addComponent("bookManagerTopic", DataObserver, false, true);
// Binds the subscribe and unsubscribe methods of the component to the application login/logout events
Spring.getInstance().addEventObserver("org.granite.tide.login", "bookManagerTopic", "subscribe");
Spring.getInstance().addEventObserver("org.granite.tide.logout", "bookManagerTopic", "unsubscribe");

5. Configure the controllers to handle dispatch of data updates


Just add the following annotation to all the controllers of the application :
@DataEnabled(topic="bookManagerTopic", params=ObserveAllPublishAll.class, publish=DataEnabled.PublishMode.ON_SUCCESS)


This references a parameter class that allows filtering of which update events can be dispatched. Here we will use an extremely simple filter class that filters nothing :

src/groovy/ObserveAllPublishAll.groovy
import org.granite.tide.data.DataObserveParams;
import org.granite.tide.data.DataPublishParams;
import org.granite.tide.data.DataTopicParams;

public class ObserveAllPublishAll implements DataTopicParams {

public void observes(DataObserveParams params) {
// Define key/value pairs that the client is able to observe
// Will be used to construct the topic selector for the client calling the component
}

public void publishes(DataPublishParams params, Object entity) {
// Define key/value pairs to add in the published message headers
// Will be used to match against the topic selector of the subscribed clients
}
}

Part 4 : Deploy all this as a war in Tomcat


Just run :

grails war

Then rename the generated bookmanager-0.1.war to bookmanager.war and copy it to the Tomcat webapps folder.
Ensure you have correctly installed the native APR connector, start Tomcat, and browse http://localhost:8080/bookmanager/bookmanager.swf, et voilà !


I will stop here for this article. We could go a bit further by adding conflict handling, or per-instance authorizations, but I let this for a future post.
Hopefully this article has shown the range of capabilities of the plugin and of the underlying GraniteDS Flex/Java integration library.

As always, don't hesitate to experiment all this and give your feedback.

jeudi 21 janvier 2010

New in GraniteDS 2.1.0 RC2: more fun with JEE6/CDI

As early testers have discovered, there have a been a few changes in the CDI API that broke the GDS integration since RC1 was released.
GraniteDS 2.1 RC2 now supports the latest CDI specification and Weld RI as included in JBoss 6 M1 and GlassFish v3 final. It can be downloaded here. There have also been improvements in the integration itself :
  • Tide remoting to CDI components (both @Named and type-safe)

  • All standard features of GraniteDS : container security, paging, lazy-loading

  • Support for CDI conversations

  • Support for client-side observers for remote CDI events

  • Client/server synchronization of CDI beans

Il still only works with Weld because of conversation support, but it should be easy to integrate with other implementations by only adapting the CDIInterceptor implementation.
Currently supported containers are JBoss 6.0 M1 and GlassFish v3 final. Some people also managed to get it working in Tomcat 6.

Configuration for JBoss 6 M1

As JBoss 6 does not support servlet 3 yet, the configuration still invoves quite a few files :
  • Add GDS libs in WEB-INF/lib : granite.jar, granite-cdi.jar and granite-hibernate.jar

  • Add AMF (and Gravity if needed) servlets in web.xml

  • Add a WEB-INF/granite/granite-config.xml :
    <granite-config scan="true">
    <security type="org.granite.messaging.service.security.TomcatSecurityService"/>

    <tide-components>
    <tide-component instance-of="org.granite.tide.cdi.Identity"/>
    <tide-component annotated-with="org.granite.messaging.service.annotations.RemoteDestination"/>
    </tide-components>
    </granite-config>

  • Configure the CDI service factory in WEB-INF/flex/services-config.xml :
    <services>
    <service id="granite-service"
    class="flex.messaging.services.RemotingService"
    messageTypes="flex.messaging.messages.RemotingMessage">

    <destination id="cdi">
    <channels>
    <channel ref="graniteamf"/>
    </channels>
    <properties>
    <factory>tideCdiFactory</factory>
    </properties>
    </destination>
    </service>
    </services>
    ...
    <factories>
    <factory id="tideCdiFactory" class="org.granite.tide.cdi.CDIServiceFactory"/>
    </factories>

  • Add an empty beans.xml in WEB-INF

Note that this configuration should also work in Tomcat 6 with a few restrictions.

Configuration for GlassFish v3 and Servlet 3 containers

  • Add GDS libs in WEB-INF/lib : granite.jar, granite-cdi.jar and granite-eclipselink.jar (or the GDS jar corresponding to your JPA provider)

  • Add a configuration class somewhere in your project :
    @FlexFilter(
    tide=true,
    type="cdi",
    factoryClass=CDIServiceFactory.class,
    tideInterfaces={Identity.class}
    )
    public class GraniteConfig {
    }

  • Add an empty beans.xml in WEB-INF

Note that with this kind of simplified configuration, there is no more services-config.xml so it is required to setup the RemoteObject endpoints manually with :
Cdi.getInstance().addComponentWithFactory("serviceInitializer", DefaultServiceInitializer, { contextRoot: "/graniteds-tide-cdi" });

Remoting

Once your application is setup for GraniteDS, you can easily enable remote access from Flex to CDI beans by adding the @RemoteDestination annotation :
@RemoteDestination
public class HelloWorld {

public String hello(String name) {
return "hello" + name;
}
}

If you can live without full type-safety, you can also add a @Named annotation and then access your beans from Flex with :
<mx:Application
xmlns:mx="http://www.adobe.com/2006/mxml"
xmlns="*"
preinitialize="Cdi.getInstance().initApplication()">

<mx:Script>
<![CDATA[
import org.granite.tide.cdi.Cdi;
import org.granite.tide.Component;

[In]
public var helloWorld:Component;
]]>
</mx:Script>

<mx:Button label="Hello" click="helloWorld.hello('Barack')"/>

</mx:Application>

If you don't want string-based references, you can use the gas3 generator to generate a Flex remote proxy for the server bean. Just include the bean class in the gas3 generation path, it will be recognized as a service by the @RemoteDestination annotation. Then you can use type-safe injection in Flex with the new [Inject] Tide annotation :
<mx:Application
xmlns:mx="http://www.adobe.com/2006/mxml"
xmlns="*"
preinitialize="Cdi.getInstance().initApplication()">

<mx:Script>
<![CDATA[
import ...;

[Inject]
public var helloWorld:HelloWorld;
]]>
</mx:Script>

<mx:Button label="Hello" click="helloWorld.hello('Barack')"/>

</mx:Application>

In this case, Tide will do a lookup of the bean by type. If there is more than one implementation, you must add @Named to let Tide choose between them because there is no real equivalent of typesafe annotations in ActionScript 3.

Events

Since RC1, the only change is that gas3 now supports the @TideEvent annotation and is able to generate a corresponding Flex event class.
@RemoteDestination
public class HelloWorld {

@Inject @Any
Event greetingEvent;

public String hello(String name) {
greetingEvent.fire(new GreetingEvent(name));
return "hello" + name;
}
}

<mx:Application
xmlns:mx="http://www.adobe.com/2006/mxml"
xmlns="*"
preinitialize="Cdi.getInstance().initApplication()">

<mx:Script>
<![CDATA[
import ...;

[Inject]
public var helloWorld:HelloWorld;

[Observer(remote="true")]
public function greet(event:GreetingEvent):void {
trace("Greeting to " + event.name);
}
]]>
</mx:Script>

<mx:Button label="Hello" click="helloWorld.hello('Barack')"/>

</mx:Application>

Client/server bean synchronization

This is quite experimental but it can be useful in some cases. It first requires to enable two interceptors in beans.xml :
<beans>
<interceptors>
<class>org.granite.tide.cdi.TideComponentInterceptor</class>
<class>org.granite.tide.cdi.TideBeanInterceptor</alias>
</interceptors>
</beans>

Note that if you have interceptors to handle transactions, they must be setup before Tide interceptors so these Tide interceptors are executed inside the transaction context.
Then you can annotate beans that you want to synchronize with @TideBean and Tide will ensure that any change made on the client is sent to the server and that any change made on the server bean is updated on the client. This synchronization process is not immediate but always delayed until the next remote call.
@TideBean @RequestScoped
@ExternalizedBean(type=DefaultExternalizer.class)
public class CurrentPerson {

private Person person;
private String greeting;

public Person getPerson() {
return person;
}
public void setPerson(Person person) {
this.person = person;
}

public String getGreeting() {
return greeting;
}
public void setGreet(String greeting) {
this.greeting = greeting;
}
}

<mx:Application
xmlns:mx="http://www.adobe.com/2006/mxml"
xmlns="*"
preinitialize="Cdi.getInstance().initApplication()">

<mx:Script>
<![CDATA[
import ...;

[Inject]
public var helloWorld:HelloWorld;

[Inject]
public var currentPerson:CurrentPerson;

private function hello():void {
currentPerson.person = new Person("Barack");
helloWorld.hello();
}

[Observer(remote="true")]
public function greet(event:GreetingEvent):void {
trace("Greeting to " + currentPerson.greeting);
}
]]>
</mx:Script>

<mx:Button label="Hello" click="hello()"/>

</mx:Application>

@RemoteDestination
public class HelloWorld {

@Inject @Any
Event greetingEvent;

@Inject
CurrentPerson currentPerson;

public void hello() {
String name = currentPerson.getPerson().getName();
currentPerson.setGreeting("hello " + name);
greetingEvent.fire(new GreetingEvent(name));
}
}

Besides the fact that this piece of code is as useless and convoluted as it can be, this bean synchronization feature should work in more useful cases.
Note that the interaction is completely typesafe accross Java/CDI and Flex/Tide, that can help avoiding errors much better than when using string-based EL component names.

mercredi 20 janvier 2010

New in GraniteDS 2.1.0 RC2: more improvements in the gas3 generator and simplified configuration

Improvements in the gas3 generator


The previous entry concerning improvements in the gas3 generator already mentioned the new possibility to define a custom EntityFactory in the ant task.

This configuration is now also available in the Eclipse plugin (Project Properties / GraniteDS / Options.


Moreover two new entity factories are also available and make possible to generate validation annotations for the Flex data model.
  • org.granite.generator.as3.HVEntityFactory supports Hibernate Validator 3 annotations

  • org.granite.generator.as3.BVEntityFactory supports Bean Validation (JSR-303) annotations

Here is what a JPA entity class with validation annotations would look like in as3 with one of these factories :
    [Managed]
public class AuthorBase extends AbstractEntity {

private var _name:String;
private var _numPosts:Number;
private var _posts:ListCollectionView;

public static const meta_hasMany:Object = {
posts: Post
};


public function set name(value:String):void {
_name = value;
}
[Length(min="5", max="50", message="{validator.length}")]
public function get name():String {
return _name;
}

[Bindable(event="unused")]
public function get numPosts():Number {
return _numPosts;
}

public function set posts(value:ListCollectionView):void {
_posts = value;
}
public function get posts():ListCollectionView {
return _posts;
}

override meta function merge(em:IEntityManager, obj:*):void {
var src:AuthorBase = AuthorBase(obj);
super.meta::merge(em, obj);
if (meta::isInitialized()) {
em.meta_mergeExternal(src._name, _name, null, this, 'name', function setter(o:*):void{_name = o as String}, false);
em.meta_mergeExternal(src._numPosts, _numPosts, null, this, 'numPosts', function setter(o:*):void{_numPosts = o as Number}, false);
em.meta_mergeExternal(src._posts, _posts, null, this, 'posts', function setter(o:*):void{_posts = o as ListCollectionView}, false);
}
}

override public function readExternal(input:IDataInput):void {
super.readExternal(input);
if (meta::isInitialized()) {
_name = input.readObject() as String;
_numPosts = function(o:*):Number { return (o is Number ? o as Number : Number.NaN) } (input.readObject());
_posts = input.readObject() as ListCollectionView;
}
}

override public function writeExternal(output:IDataOutput):void {
super.writeExternal(output);
if (meta::isInitialized()) {
output.writeObject((_name is IPropertyHolder) ? IPropertyHolder(_name).object : _name);
output.writeObject((_numPosts is IPropertyHolder) ? IPropertyHolder(_numPosts).object : _numPosts);
output.writeObject((_posts is IPropertyHolder) ? IPropertyHolder(_posts).object : _posts);
}
}
}

Two important things are marked in blue :
  • meta_hasMany is a new generated constant that makes possible to know at runtime the type of data in toMany associations. This has two uses : first it forces the compiler to include the associated class by referencing it, then it can be a useful metadata for any client-side framework to know the real type of the associated class at runtime.

  • [Length] has been generated from a Hibernate Validator annotation. Also this can be useful metadata for a client-side framework. And though this is not of much use right now, it sure will be.

Simplified configuration for Spring, Seam


I've already talked about Spring and Seam in a previous post, I'll just mention a few minor improvements and an important change.
In RC1, this was possible to define simple and JMS messaging destinations in the Spring/Seam configuration. This is now supported for ActiveMQ destinations.
It's also possible to define security roles allowed for the Tide destinations :
<graniteds:flex-filter url-pattern=".." tide="true">
<graniteds:tide-roles>
<graniteds:value>ROLE_USER<value/>
</graniteds:tide-roles/>
</graniteds:flex-filter/>

In Spring, there are two new tags :
<graniteds:tide-persistence id="myPersistence" transaction-manager="transactionManager"/>
This declares a Spring persistence manager for Tide lazy-loading that will use the specified Spring transaction manager. Note that is you have only one Spring transaction manager, this is not necessary and Tide will automatically create a default Spring persistence manager.

<graniteds:tide-identity/>
This defines the default Spring security integration bean for Tide. The parameters for integration with Spring security ACL can also be defined here :
<graniteds:tide-identity acl-service="aclService" sidRetrievalStrategy="sidRetrievalStrategy" objectIdentityRetrievalStrategy="oidRetrievalStrategy"/>


The most important thing is the client-side part. In RC1, you had to define a remoteObjectInitializer and build an AMF channel manually. This is now much easier, but take care that there are minor changes to do in your Flex code :
Spring.getInstance().addComponentWithFactory("serviceInitializer", DefaultServiceInitializer, { contextRoot: "/graniteds-tide-spring" });

As you can see, the job is now done by a service initializer class. The DefaultServiceInitializer is suitable in most cases and can be configured with optional server name, port and url mappings for remoting and messaging.
The defaults are :
  • http://{server.name}:{server.port}/graniteds-tide-spring/graniteamf/amf.txt for remoting

  • http://{server.name}:{server.port}/graniteds-tide-spring/gravityamf/amf.txt for Gravity

If you have custom requirements, such a retrieving these urls remotely for an AIR application, you just have to implement IServiceInitializer and add your implementation as a component.

Simplified configuration for Servlet 3 containers


Servlet 3 is very new and is currently supported only in GlassFish v3. However it brings many improvements for framework developers.
Now you just have to define a configuration class annotated with @FlexFilter somewhere in your project and GraniteDS will completely configure itself, there is absolutely nothing else to do. Here is the config class from the example, it is the equivalent of what would have been in granite-config.xml and services-config.xml :
@FlexFilter(
tide=true,
type="ejb",
factoryClass=EjbServiceFactory.class,
ejbLookup="java:global/graniteds-tide-ejb3/{capitalized.component.name}Bean",
entityManagerFactoryJndiName="java:comp/env/jpa",
tideInterfaces={EjbIdentity.class}
)
public class GraniteConfig {

@MessagingDestination(noLocal=true, sessionSelector=true)
AbstractMessagingDestination addressBookTopic;

}

It's hard to think how to do less : just put granite jars in your WEB-INF/lib, create a simple config class and that's all !
Note how Gravity destinations can be defined as fields of this configuration class with @MessagingDestination, @JmsTopicDestination or @ActiveMQDestination.

We'll see how this works when there will be other Servlet 3 containers but this is definitely a great improvement in usability.